Monday, December 30, 2013

DIY Dresser Entertainment Center

As most of you know, I moved into my first apartment this weekend. I spent hours and hours searching for the perfect furniture. I really love the whitewash-rustic-chique look but it was so hard to find something the was adorable and affordable. That's when my dad's handyman skills and workshop came in handy!

Here is an old dresser we picked up from Goodwill for $50. It was made out of solid oak wood which was perfect!


 The top was made out of a hard plastic-type coating which we weren't able to sand, so we took off the top. Then I had to decide which drawers I wanted to take out--I went with the top row. I also debated taking out the top two drawers in the middle.


 Once we took out the drawers, you can see there was an indent from where they were and I wanted it to be a smooth surface.


 To make it all even, we measured and cut plywood to fill in the space. Here's me using my dad's fancy tools ;) The bottom of the dresser also had a scalloped design and I wanted it to be more sleek so my dad cut it to make it straight across.

 We used wood glue to secure the plywood in place and cocked around the border to fill in any gaps.

On to sanding which was by far my least favorite part--lets face it, who likes to sand? Luckily we only needed to take off the top coating which had a glossy finish. The primer we used said it wasn't necessary to sand, but rather be safe than sorry!


 We took off the ugly old handles and used wood filler to fill in the previous holes. Time to prime!

Next, I painted it two coats of white. It was a little tricky to get rid of all the streaks so this takes time!


 Next, my dad drilled holes for the new handles (the original handles were a weird size that they didn't sell at Home Depot). He also made the top!

This color was achieved by using two different colored stains. One was a very light whitewash color and one was a darker gray. Neither looked too good by themselves but I thought they looked so much better together.


I love my little entertainment center! Its perfect and has tons of storage. I still want to get a few cute decorations to put in the side cubbies or near the TV. It took quite a bit of time to make this, but I love having a unique piece of furniture that I can say I made :)

Sunday, December 15, 2013

DIY Bath Bombs / Fizzies

After my DIY: Scented Bath Salts post and video, it was highly requested for me to do a DIY Bath Bomb tutorial! This takes more time, and is a little more messy...but a fun project! If you make the two projects together, it makes a great gift set for the holidays.


Supplies:
  • 2 Cups Baking Soda
  • 1 Cup Citric Acid
  • I Cup Cornstarch 
  • 2 TBSP Extra Light Olive Oil
  • 10 drops Essential Oil
  • Spray Bottle
  • Water or Witch Hazel
  • Food coloring / Soap coloring 
  • Twine
  • Jar or recycled candle jar
  • Cardstock / Tag
  • Dried Herbs / Sea Salt (Optional)
  • Silicone Ice Tray / Cookie Cutters 
  • Bamboon Spoons (I got mine here)
Directions:
  • Combine dry ingredients in a bowl (baking soda, citric acid, cornstarch)
  • Add in extra light olive oil; mix. Add essential oil.
  • Combine water and a few drops of food coloring in a spray bottle.
  • SLOWLY start to spray mixture into the bowl, mixing as you spray. If you add too much water, it will start to fizz and expand so do this step slowly.
  • Keep adding water until it is a wet-sand-like consistently (Just wet enough that the sand will stick together.)
  • Pack mixture into a silicone ice tray. If you want to make a perfect square-shape, use a butter knife to scrape across the top. 
  • Let sit in the mold for about two minutes.
  • Pop out of mold and let them dry overnight.

Yields:
  The measurements I used, with the tray size I used, makes between 50-60 small cubes which filled two large jars.

Video Tutorial:


Wednesday, December 11, 2013

DIY: Scented Bath Salts

What better gift for that special woman in your life (or yourself) than bath salts?! Homemade bath salts are fun to make and will save your wallet at the same time! If you all enjoy this simple DIY let me know if you'd like to see DIY Bath Bombs too. Here is the little cute jar I made:


Supplies:

Dry Ingredients: 
1 1/2 Cup Epsom Salt
1/2 Cup Sea Salt (This is optional, but adds some different texture)
1/4 Cup Baking Soda

Wet Ingredients: 
10 drops of Essential Oil (More or less based on how strong you want it)
2-8 drops of food coloring/soap coloring

Optional Decoration Pieces:
Twine
Tag / Cardstock
Jar with lid (This is a recycled candle jar)
Small spoon (I got these cute bamboo ones here).

Directions

  • Mix together all dry ingredients in a bowl. 
  • Add a few drops of food coloring at a time and mix until you reach desired color.
  • Add about 10 drops of essential oil. There are really cool lists online that show you what each oil does for you. Some help allergies, keep you focused, relaxed, etc.
  • Spoon into jar.
  • Create tag and wrap with twine.
  • ENJOY!

Yields:
The above measurements were enough to fill one large jar. Use smaller jars or bottles for the perfect gift!


If you'd like to see this DIY in video form, watch here:


Thursday, November 21, 2013

Get The Look: Lorac Pro Palette Dupes


Hi guys! Today I filmed one of my favorite and most-requested makeup tutorials! Every time I wear this in a video I get so many compliments and requests--so voila, here it is:


Now to achieve this look, I use my Lorac Pro Palette. But that would be a bummer for all of you who want to get this look and don't have this palette. DUN-DUN-DA! I'm here to the rescue. I've put together some drugstore dupes for you that will get you this same look. Some of them aren't identical, but fit the same color scheme and are pretty darn close.


Top: "Champagne" from the Lorac palette. Light glittery pink.


Bottom: Covergirl "Sheerly Nudes" quad, second color from the right. Not quite as pigmented but definitely close.


 Top: "Mauve" Lorac palette. Matte color.

 Middle: Wet N' Wild "Silent Treatment" bottom color of the trio. Gorgeous mauve color with shimmer.

Bottom: "Tease" Naked 2 palette. Deep mauve matte color.  


 Top: "Pewter" Lorac Pro Palette. Really a unique purple-y brown color.

Middle: Maybelline Stylish Smokes Quad "Lavender Smokes" Bottom liner color. More purple than Pewter but will fit nice with this look.

Bottom: Maybelline Modern Metallics Quad. "Sunlit Bronze" Bottom liner color. Almost perfect match just a little less brown.


Are you ready to try this look out for yourself? Click here for a video tutorial:


Thursday, November 14, 2013

DIY 21st Birthday Present

The big 2-1 is a huge milestone for many! My boyfriends 21st birthday is coming up this month and like any video gamer he wants the new PS4. But I wanted to get him a little something else as well to give him on his actual birthday. VOILA! I saw this idea on Pinterest and knew it would be perfect. I took a few ideas of my own and put this bad boy together.


Project Cost:
$30-$40

Project Time Estimate:
20-30 minutes


Here's what you'll need:

  • Pot / Bucket (This one is from Old Time Pottery)
  • Styrofoam insert (Dollar store / Old Time Pottery)
  • Tinsel 
  • Decorative swirly pieces (Old Time Pottery)
  • Pipe cleaners
  • Foam sheets (for numbers)
  • Thin sticks (got these from Publix)
  • Hot Glue
  • Mini alcohol bottles  


More of a visual person? Watch this tutorial on how to make it!

Wednesday, November 13, 2013

3 Minute Gel Nails

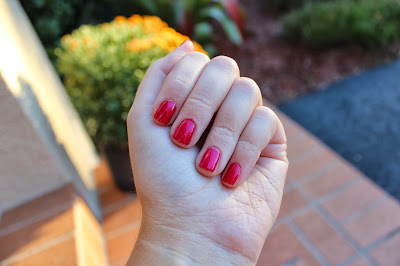
After my favorite Sally Hansen Fast-Dry Topcoat died out on me, I was in the market for a new topcoat.  I've repurchased the Sally Hansen topcoat many times and even though I love it, I wanted to experiment with a few others. That's when this Nail-Aid 3 Minute Artificials caught my eye. I couldn't pass it up for the price! Not to mention, I absolutely love gel nails but going to the salon every two weeks can get time consuming and costly. What did I have to lose?


Here are a picture of my nails before:


Here is after I used the topcoat:


You can see this top coat adds tons of shine, as gel polish does! But 3 minutes?! Not too sure where that comes from. It dries to the touch after about 15-20 minutes. However, I painted my nails and seven hours later when I went to sleep, it still left impressions on my nails. I also experienced chipping as any normal polish so it didn't last for two weeks as my gel polish does.

Overall, this is not something I would repurchase or even keep using. Have you tried this product out--if so, what do you think?


Sunday, August 25, 2013

Revive Your Mascara!

  I always feel like my mascara is drying out! Its the #1 thing I have to constantly repurchase for makeup collection. I always make the mistake of buying more than one at a time and they never last as long as they should. VOILA! I have an AMAZING solution for your dried out, almost-empty mascara tube. This quick little tip will be saving you money, and all those trips to the drugstore.


  When your mascara life is running out, or drying up simple drop 4-5 drops of eyedrops or saline solution into the bottle and use your want to mix it around. Eyedrops can tend to irritate my eyes, so I prefer using saline solution which I already have laying around from my contacts! It brings your mascara back to life instantly. 

  The only setback I have is when I go to take off my makeup. It I just use water on my eyes to wash off my mascara, it tends to irritate my eyes. It must have something to do with the saline solution mixture. However, if I use makeup remover pads, I cannot tell the difference between a brand new bottle of mascara and my new concoction! 

  And there you have it! A quick fix to reviving your mascara!

Saturday, August 17, 2013

Self-Tanning ft. St. Tropez Bronzing Mousse

     This girl right here has done plenty of experimenting with self-tanning and I'll have to say, I think I've found the solution that's right for me. Spray tanning was too much of a hassle for me, and with light skin, I want to tan the healthy way. I've tried out drugstore tanners to high end and I've found my absolute favorite so far! The St. Tropez Bronzing Mousse  works great on me! Like everything else I usually buy, I got this off of Amazon which saved me about $10.


Here are some before and after pictures!


Want to hear more about this tanning mousse? Watch my video review below:


Friday, August 16, 2013

Beauty Blender: Is It Worth The Hype?


    I finally caved and bought this little gem after hearing so much about it! So what made me purchase it? I was getting tired of my makeup brushes caking up and wanted a light flawless finish for summer. When I received it in the mail I was so excited to try it out, but one problem--how do I use it?! Now I'm here to help all of you with that same question. PLUS we'll discover if its really worth all the hype its received.

     First things first, I got mine off Amazon (I pretty much get everything off of here) and there were many different "packages". I chose this one which included two beauty blenders as well as a cleaner--did I mention it packed a pretty hefty price tag ($33)?  


Pros
  • Leaves a flawless, airbrushed finish
  • Doesn't look cake-y (I guess that kinda goes with the point above)
  • Uses less makeup because a little goes a long way!
  • Quick application 
Cons
  • The crazy price! Remember those old wedge makeup sponges your grandma uses? The ones that are like 99 cents....
  • They are almost impossible to clean completely. I would suggest skipping out on their makeup cleanser because you can clean this sponge just as well with baby shampoo or dish soap.
  • If you don't clean the Beauty Blender after every use it can cause your skin to break out due to all the bacteria build up.
  • With great care they will last for a few months, but not for years like your makeup brushes.


Now let's take a look at how to actually use this odd shaped sponge!


 1. Dampen your sponge. I like to run it under the water, squeeze, repeat. Once I feel like it has expanded I will squeeze out as much water as I can until it is damp. As you can see, it definitely expands and is meant to be used damp.
 2. Apply a pea sized amount of your foundation to the sponge. Quickly tap along small sections of your face. I like to use the tapered top of the sponge to apply foundation to around my nose and under my eyes.

3.When you're finished, you'll have a dirty Beauty Blender like the one on the left.


4. Using any sort of brush cleaner, baby shampoo, or dish soap thoroughly clean your Beauty Blender. Really massage the soap into the sponge and repeat until it seems like there isn't anymore foundation coming out. It looks much better, but still not back to brand new!


When asked if the Beauty Blender is "Worth the Hype",  I'd say 'yes'. It is very over priced, but its a great concept. I'll be keeping an eye out for some good dupes to this brush. I've heard many of the dupes from drugstores and Ulta are too hard and do not compare. I wouldn't recommend this to anyone who does not want to keep up with cleaning it.

Now its your turn to decide! Do you think the Beauty Blender is worth the hype?

Wednesday, August 14, 2013

3 Ways To Curl Your Hair

Ever wondered how to get different types of curls with one curling iron? I'm here to help! This video provides a 3-in-1 tutorial showing you how to do just that. The key is all in the way you wrap your hair around the barrel. In this video I use the NuMe 4-Play Curling Wand. This wand is simply amazing!


Get To Know Me!


Hi everyone! My name is Courtney and thanks for stopping by my blog! I make beauty/fashion videos on Youtube (spreadinsunshine15) and have decided to give blogging a shot. I love taking pictures and ever since I was a little girl I loved writing stories, so now I'm combining the two together! Here are some questions I get asked a lot and hopefully they'll help you get to know me a little more :)

*How old are you?
My birthday is March 26, 1994 which makes me 19!

*How many brothers/sisters do you have?
I have a younger sister (16), an older step-sister (19) and an older step-brother (24). My step siblings live out of state though.

*What kind of camera do you have?
I have a Nikon S8200 that I use for taking quick pictures and I used to use for filming. A few months ago, I invested in the Canon Rebel t3i and I'm in LOVE with it!

*What made you start making Youtube videos?
One summer, my step-sister and I were bored and were watching Fred on Youtube. We thought the videos were so strange that if he could make videos, we could too! We made all sorts of random videos and talk-shows but none of those were successful like we had hoped. One day, I decided to film "How to French Braid Your Own Hair" on my very old Logitech webcam. Who would have guessed how fast that video took off!

*Are you going to college? If so, what for?
I am! College has always been a big thing in my family, so of course, what choice did I have but to go? LOL--I would've gone either way though. Currently I have my AA degree, plan on getting my bachelors degree in microbiology, and going on to dental school to become an orthodontist.

*What do you do outside of Youtube?
Free time is not something I have a lot of! I work at T.G.I Friday's as a hostess and server, and attend school full time. Spending time with my family and boyfriend is also very important to me, so they get most of my free time! I do love going to the beach though, reading and doing puzzles--I'm a little bit of an old lady.